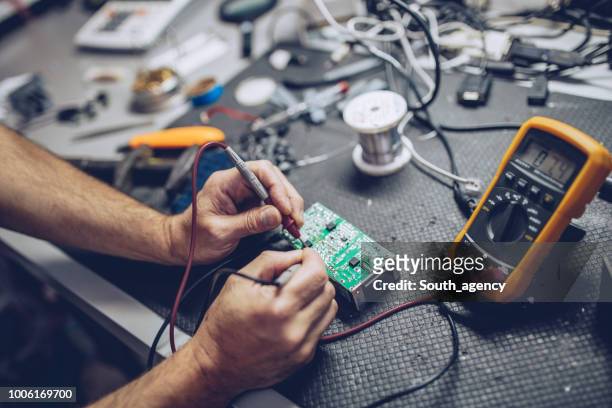
Power Supply Repairing
### Power Supply Repairing: Comprehensive Guide
Power supplies are critical components in any electronic device, providing the necessary power for proper operation. When a power supply malfunctions, it can lead to device failure or suboptimal performance. Repairing a power supply involves understanding its components, diagnosing issues, and applying the correct fixes. Here’s a detailed overview of the power supply repair process:
#### Understanding Power Supplies
Power supplies convert electrical energy from one form to another, typically transforming AC (alternating current) from the mains into DC (direct current) for use in electronic circuits. There are several types, including:
– **Linear Power Supplies:** Simple design, use a transformer to reduce voltage, and provide a stable output.
– **Switch-Mode Power Supplies (SMPS):** More efficient, lightweight, and compact, using high-frequency switching to convert power.
#### Common Components
1. **Transformer:** Steps down the input voltage.
2. **Rectifier:** Converts AC to DC.
3. **Filter Capacitors:** Smooth out the rectified voltage.
4. **Voltage Regulator:** Maintains a constant output voltage.
5. **Heat Sinks:** Dissipate heat from components.
6. **Inductors:** Filter and stabilize the current.
7. **Protection Circuits:** Prevent over-voltage, over-current, and short circuits.
#### Diagnosing Issues
1. **Visual Inspection:**
– Check for burnt components, bulging capacitors, and broken connections.
– Look for any signs of physical damage or overheating.
2. **Testing with Multimeter:**
– Measure input and output voltages to identify discrepancies.
– Test components like diodes, capacitors, and transistors for continuity and proper functionality.
3. **Symptom Analysis:**
– **No Power Output:** Check the fuse, rectifier, and transformer.
– **Intermittent Power:** Look for loose connections or failing capacitors.
– **Overheating:** Inspect cooling systems and ensure proper ventilation.
#### Repair Techniques
1. **Replacing Faulty Components:**
– **Capacitors:** Replace any that are bulging or leaking.
– **Diodes and Transistors:** Swap out any that fail continuity tests.
– **Fuses:** Replace blown fuses with the same rating.
2. **Resoldering Connections:**
– Repair any cracked or cold solder joints to restore proper connectivity.
3. **Cleaning:**
– Remove dust and debris that can cause overheating and electrical shorts.
– Use isopropyl alcohol to clean the circuit board.
4. **Testing After Repair:**
– Use a multimeter to confirm voltage outputs are within specifications.
– Test the power supply under load to ensure stability and reliability.
#### Safety Precautions
– Always unplug the power supply before beginning repairs.
– Discharge capacitors to prevent electric shock.
– Use appropriate personal protective equipment (PPE) like safety goggles and gloves.
– Be cautious of high voltage areas, especially in switch-mode power supplies.
#### Tools and Equipment
– Multimeter
– Soldering iron and solder
– Screwdrivers and pliers
– Desoldering pump or braid
– Replacement components (capacitors, diodes, fuses)
– Insulated mat and ESD wrist strap
#### Conclusion
Repairing power supplies requires a blend of technical knowledge, careful diagnosis, and precise repair techniques. By understanding the components and common issues, you can effectively troubleshoot and repair various power supply types, extending the life of electronic devices and ensuring their optimal performance. Always prioritize safety and follow best practices during the repair process.
