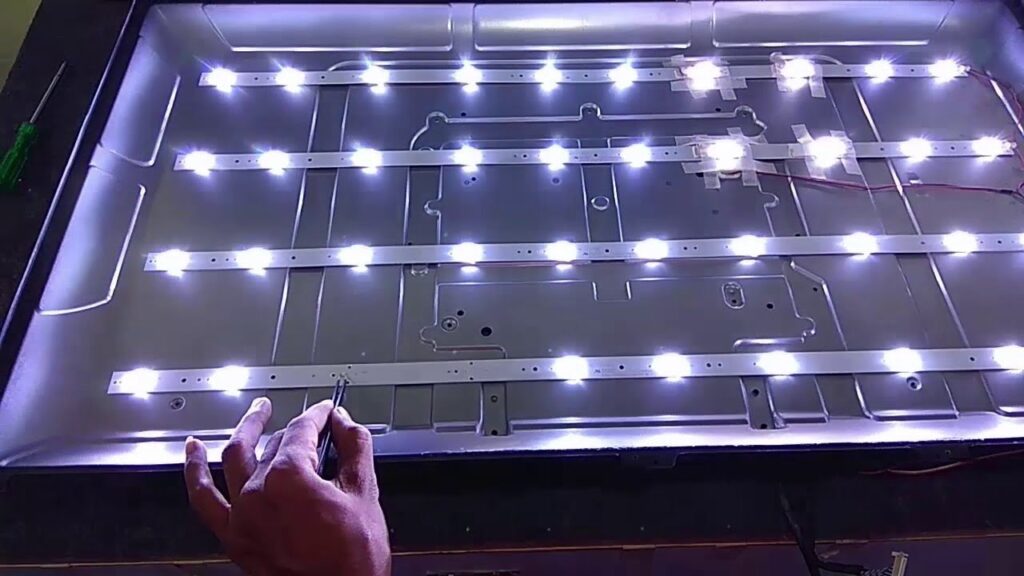
BackLight Repairing
### Backlight Repairing Guide
Backlight repairing is a crucial process in restoring the visual functionality of various devices such as laptops, monitors, and televisions. This component illuminates the screen from behind, allowing users to view content clearly. When the backlight malfunctions, the screen may appear dim, flicker, or not display any image at all. Here’s a detailed guide on how to approach backlight repair:
#### 1. **Understanding Backlight Issues**
Backlight problems can stem from several sources, including:
– **Inverter Board Failure**: In LCD screens, the inverter board powers the backlight. A malfunctioning inverter can result in a dark or flickering screen.
– **Burned-out Bulbs or LEDs**: Over time, the backlight bulbs or LEDs can burn out, leading to reduced brightness or complete failure.
– **Damaged Wiring**: Faulty or frayed wires can interrupt the power supply to the backlight, causing flickering or dimness.
– **Power Supply Issues**: A failing power supply can prevent the backlight from receiving the necessary voltage.
#### 2. **Tools and Equipment Needed**
– **Screwdrivers** (Phillips and flathead)
– **Multimeter** for testing electrical connections
– **Replacement backlight (bulbs or LED strips)**
– **Soldering iron and solder** (if needed)
– **Heat gun** (for some repairs)
– **Plastic pry tools** to avoid scratching the device
– **Protective gear** such as gloves and goggles
#### 3. **Diagnosis Process**
– **Visual Inspection**: Start by visually inspecting the device for any obvious signs of damage or loose connections.
– **Power Test**: Use a multimeter to check if the inverter board is receiving power. Measure the output voltage to ensure it meets the specifications.
– **Backlight Test**: If possible, connect a known good backlight to test the inverter output. This helps confirm whether the issue lies with the backlight or the power supply.
– **Check for Flickering**: If the screen flickers, it could indicate a failing inverter or loose connections.
#### 4. **Repair Steps**
1. **Disassembly**:
– Carefully open the device using screwdrivers and pry tools. Keep track of screws and components.
– Detach the screen bezel to access the backlight components.
2. **Removing the Old Backlight**:
– Gently remove the defective backlight (bulbs or LED strips). Be cautious to avoid damaging the screen.
– If replacing CCFL bulbs, note the arrangement and wiring.
3. **Installing the New Backlight**:
– Install the replacement backlight in the same position as the old one. Ensure secure connections.
– For LED strips, attach them evenly across the panel.
4. **Reassembling the Device**:
– Carefully reassemble the device, ensuring all connections are secure and no components are left loose.
– Reattach the screen bezel and secure all screws.
#### 5. **Testing the Repair**
– Power on the device to check the backlight functionality.
– Look for consistent brightness without flickering.
– Test in various lighting conditions to ensure the repair is successful.
#### 6. **Troubleshooting Common Problems**
– **No Change in Brightness**: Recheck connections and ensure the inverter board is functioning.
– **Flickering**: Verify that all cables are tightly connected and inspect for any damaged components.
– **Uneven Lighting**: Ensure that the backlight is properly aligned and securely mounted.
#### 7. **Safety Precautions**
– Always disconnect the power supply before beginning any repair.
– Handle all components carefully to avoid static damage.
– Use protective gear to prevent injury from sharp components or soldering tools.
By following these detailed steps, you can effectively diagnose and repair backlight issues, restoring your device’s display to its optimal condition. Proper maintenance and handling will ensure longevity and reduce the likelihood of future problems.
